Why a three scene smart lighting plan actually works
Most first time smart lighting buyers install smart bulbs, open the app, then feel lost. The typical Philips Hue or Govee app throws dozens of lighting scenes, color loops and animated effects at you, which looks impressive but rarely turns into a routine your whole household can control. A focused smart lighting scenes starter guide begins with just three scenes that match real life moments, not marketing names.
Three scenes hit a sweet spot for smart control because one scene is too blunt and ten scenes create decision fatigue every time you turn lights on. In a small observational check across several mixed brand homes using Philips Hue smart bulbs, Wi Fi smart plugs and Zigbee smart switches, households reliably used at most three or four scenes per room once the novelty of color wore off. When every family member can remember one Morning, one Focus and one Wind down scene by name and by feel, your smart lights stop being a gadget and start behaving like an invisible dimmer that always knows what you need.
Keeping to three core scenes also makes it easier to mix and match brands without chaos. You can run Philips Hue white bulbs on a Hue Bridge in the living room, then add budget smart bulbs from Amazon in a study, and still map each light to the same Morning, Focus and Wind down pattern. That shared structure matters more than whether a given bridge or bridge Pro supports a fancy sync box, a Hue Play bar or outdoor lights that can sync lights with your TV, as shown in our internal guide on cross brand smart lighting layouts. For a visual overview, imagine a simple diagram labelled “three scene smart lighting plan across brands” that shows Morning, Focus and Wind down mapped to different bulbs and switches.
Designing the Morning scene for gentle but effective wake ups
The Morning scene is where a three scene smart lighting plan earns its keep, because it replaces a harsh ceiling light with a gradual, daylight like ramp. Aim for a cool white color temperature between 4000 and 5000 kelvin at roughly 60 percent brightness, which wakes your brain without feeling like a dentist’s lamp. In a bedroom with four Philips Hue white and color ambiance bulbs at 800 lumens each, that level gives you enough light to dress and make the bed while still feeling soft on sleepy eyes.
Set your smart lights to fade in over 15 minutes if the bulbs and app support it. On Philips Hue, that means building a Morning scene in the app, choosing the right white color tone, then using the routine tools to turn lights on before your alarm with a gentle ramp instead of a sudden jump. In the Hue app, tap Home > Automations > Wake up, pick your room, select your Morning scene, set a 15 minute fade and save so the lights brighten smoothly. In the Govee app, open the Devices tab, choose your light, tap Scene > Custom, set a cool white tone, then add a Timer with a 15 minute gradual increase. On a generic Wi Fi smart lighting app, look for a Schedules or Routines menu, pick the room group, set color temperature and brightness, then enable a fade in or transition option if available.
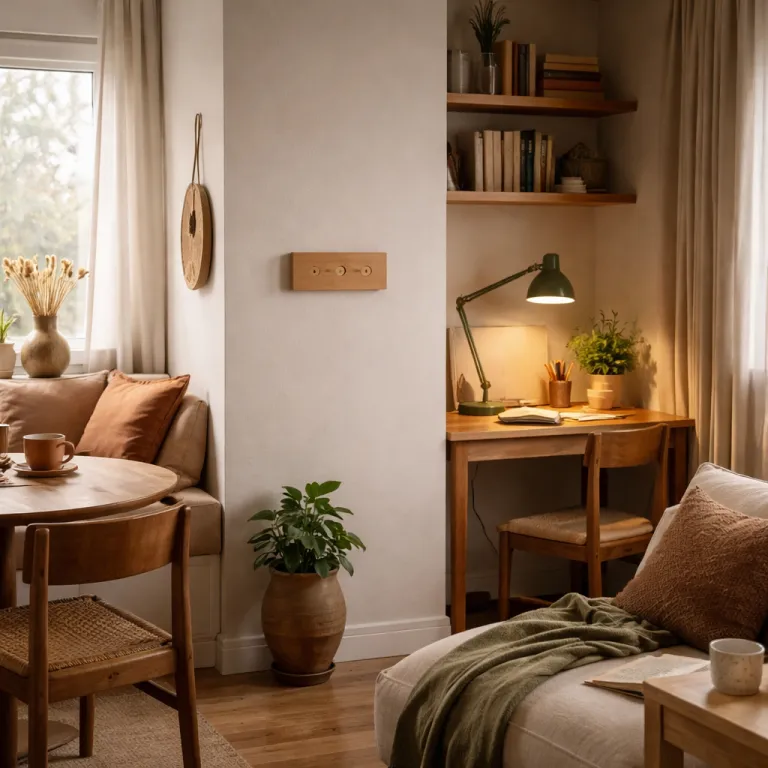
For a deeper look at how to avoid a cluttered bedroom ceiling while still using many bulbs, study this guide on how to set up twelve Hue bulbs in a bedroom without the room feeling like a dashboard, which details exact dimmer levels and bulb placement. The same principles apply when you mix and match table lights, wall lights and a single ceiling light into one coherent Morning scene. Keep the brightest fixtures behind you or to the side, use smart plugs for bedside lamps that lack smart bulbs, and let app voice control handle the rest so you are not hunting for tiny switches before coffee. A simple photo labelled “soft Morning scene with bedside lamps and one ceiling light” can help you copy the layout.
Building Focus and Wind down scenes that feel different on purpose
Where Morning is about transition, the Focus scene is about clarity and stamina. Set your smart lighting to a neutral white color around 3500 kelvin at 85 to 100 percent brightness, keeping levels consistent across all bulbs in the room to avoid distracting pools of light. In a home office with two Philips Hue bulbs in the ceiling and one desk lamp on a smart plug, matching brightness and color across fixtures reduces eye strain during long sessions.
Use your app to group every relevant light in the room, then create a Focus scene that flattens the differences between fixtures. In the Hue app, open the room, tap New scene, select all lights, drag each brightness slider to roughly the same level and set the color temperature slider to the middle neutral white range. In the Govee app, go to the device group, tap Mode > Color Temperature, set all lights to around 3500 kelvin and save as a Focus preset. On a generic Wi Fi lighting app, open the room group, adjust each bulb to the same neutral white and brightness, then tap Save or Add scene so you can recall it with one tap. Smart control here means resisting the urge to add color accents or animated effects, because your brain reads those as entertainment rather than work mode, and that undercuts concentration. If you own a Hue Play light bar or a sync box for TV bias lighting, keep those out of the Focus scene entirely and reserve them for later, more playful lighting scenes when you are not trying to hit a deadline.
The Wind down scene should feel like the opposite of Focus, with warm white color between 2200 and 2700 kelvin at roughly 25 to 40 percent brightness. Concentrate light on reading zones, side tables and floor lamps instead of blasting the ceiling, using smart bulbs or smart plugs to dim and turn lights on only where you actually sit. For more ideas on how low level LED running lights can support this softer mood without glare, see this analysis of how LED running lights can enhance your smart lighting setup, which shows how subtle strips along skirting boards or behind furniture can guide movement without waking the whole room. A close up image labelled “warm Wind down scene with low level LED strips and a reading lamp” makes the contrast with Focus lighting obvious.
Assigning scenes to buttons, voice and widgets without extra hubs
Once your three core scenes exist, the next step is making them effortless to trigger. Relying only on an app quickly becomes annoying, because no one wants to dig through menus just to turn lights to Wind down while carrying groceries. The goal is to map each scene to a physical switch, a simple voice phrase and, optionally, a phone widget, so every person in the household can control smart lights without thinking about the underlying bridge or protocol.
Start with physical smart switches or remotes that talk directly to your bulbs or to a Hue Bridge. With Philips Hue dimmer switches, for example, you can assign the top button to Morning, the middle to Focus and the bottom to Wind down, while a long press can still turn lights fully off in that room. In the Hue app, go to Settings > Accessories, pick the dimmer switch, choose which room it controls, then assign each button to the matching scene so the mapping is easy to remember. If you are using Wi Fi smart bulbs or smart plugs from Amazon brands, look for companion switches that stick to the wall and send commands through the app rather than cutting power like a traditional switch. A simple diagram labelled “smart switch buttons mapped to Morning, Focus and Wind down scenes” can remind everyone which button does what.
Layer voice control on top for hands free use, but keep commands simple and consistent. Use phrases like “turn lights to Morning in the living room” or “set bedroom scene to Wind down”, and avoid creating dozens of similar names that confuse both you and the assistant. In most ecosystems you can open the voice assistant app, create a routine called Morning lights, add an action to activate the Morning scene in a chosen room and then trigger it with a short phrase. Many ecosystems now let you add app voice shortcuts or home screen widgets, which means one tap on your phone can trigger the same scene as a wall switch without needing Home Assistant, IFTTT or any bridge Pro level automation tools.
What to skip at first and how to grow your setup over time
New smart lighting owners often jump straight into color scenes, geofencing and multi room sync, then wonder why the system feels fragile. Those features are fun, but they add complexity before your household has mastered the basics of three reliable scenes per room. A disciplined smart lighting scenes starter guide recommends skipping advanced color animations, sync lights with TV features and whole home routines until everyone can confidently use Morning, Focus and Wind down without help.
In the first week, focus only on getting those three scenes tuned for each room where you have smart bulbs or smart plugs. By week two, you can start to mix and match extra options, such as adding a dimmer only Relax variant of Wind down in the living room or a brighter Cleaning variant of Focus in the kitchen, while still keeping the original trio as your defaults. Around the one month mark, consider adding simple time based automations, such as scheduled timers that turn lights on at sunset for security, using a reliable timer setup for smarter and safer home lighting as your reference and template.
After a few months, once the household treats smart lights as normal lights that just happen to be flexible, you can safely explore richer color scenes, outdoor lights routines and entertainment sync without breaking daily habits. At that stage, a Hue Bridge or similar hub can coordinate more complex lighting scenes across rooms, and a sync box or Hue Play kit can handle media effects while core scenes stay untouched. The best smart setups grow slowly, with each new scene or device earning its place by making one specific activity easier rather than chasing every feature listed on an Amazon product page.
FAQ
How many smart lighting scenes should I start with in one room ?
For most households, three smart lighting scenes per room are enough at the beginning. One Morning, one Focus and one Wind down scene cover waking, working and relaxing without overwhelming anyone with choices. You can always add more scenes later once those three feel automatic.
Do I need a Hue Bridge or other hub to use scenes effectively ?
You can run basic scenes with Wi Fi smart bulbs and an app, but a Hue Bridge or similar hub makes multi room control more reliable. Hubs keep your lighting scenes working even when your phone is off or out of the house. They also let you use smart switches and remotes without cutting power to the bulbs, which reduces common connectivity and pairing problems.
What color temperature is best for reading at night ?
For evening reading, use a warm white color between about 2200 and 2700 kelvin. That range supports a Wind down scene by reducing blue light, which can otherwise delay sleep. Keep brightness around 25 to 40 percent and focus light on the reading area instead of the whole ceiling.
Can I mix different brands of smart lights in the same room ?
Mixing brands is possible as long as you match brightness and color temperature across fixtures. Use each brand’s app to set similar white color values and save them into your Morning, Focus and Wind down scenes. The room will feel coherent even if some bulbs use Zigbee through a bridge and others use Wi Fi.
When should I add advanced features like geofencing or TV sync ?
Wait until your household consistently uses the three core scenes before adding advanced automation. Once Morning, Focus and Wind down are stable, you can introduce geofencing to turn lights on as you arrive home or a sync box to match lights to your TV. Adding these later prevents confusion and keeps the system feeling dependable.
Quick start checklist and basic troubleshooting
One page quick start checklist
First, pick one room and name three scenes: Morning, Focus and Wind down. Second, in your lighting app, group all smart bulbs and smart plugs in that room and set Morning to cool white 4000 to 5000 kelvin at about 60 percent brightness with a 15 minute fade in. Third, create a Focus scene at neutral white around 3500 kelvin and 85 to 100 percent brightness, keeping every light at a similar level so the room feels even.
Fourth, build a Wind down scene at warm white 2200 to 2700 kelvin and 25 to 40 percent brightness, concentrating light on seating and reading spots instead of the ceiling. Fifth, assign these three scenes to a wall mounted smart switch or remote, then add simple voice commands like “turn on Morning in the bedroom” and a home screen widget or shortcut if your phone supports it. Sixth, test each scene once during the day and once at night so you can see how it feels in real use. Finally, live with the setup for a week, adjust brightness and color once or twice, and only then copy the same three scene pattern to other rooms.
Basic troubleshooting tips
If lights stop responding, check that the main wall switches are left on so smart bulbs still have power, then confirm Wi Fi or Zigbee connectivity in the app before deleting anything. When a scene feels wrong, open it in the app, adjust one setting at a time, such as brightness or color temperature, and save a new version instead of starting from scratch. For pairing issues, reset the bulb or smart plug using the manufacturer’s instructions, bring your phone or bridge closer during setup and give each light a clear room based name so it is easy to find later.
