
Understanding tape light in smart lighting
What Makes Tape Light Unique in Smart Lighting?
Tape light, also known as LED tape or strip lights, has become a popular choice for customers looking to upgrade their lighting experience. Unlike traditional bulbs, tape lighting offers a flexible, low-profile solution that can be installed in tight spaces, such as under kitchen cabinets or along shelves. This makes it ideal for both accent and task lighting in homes and commercial spaces across the United States.
Key Features of Tape Light
- Flexibility and Size: Tape lights are available in various sizes and densities, allowing you to select the right product for your specific needs. High density tape provides more light LEDs per inch, resulting in brighter and more uniform illumination.
- Color Options: Many tape lights offer tunable white or daylight white options, letting you adjust the color temperature to match your mood or activity. Warm white is popular for cozy spaces, while white light or daylight white is preferred for task areas like the kitchen.
- Performance: Look for tape lights with a high CRI (Color Rendering Index) rating, which ensures colors appear more natural under the light. High density and lumens per foot are also important for achieving the desired brightness.
- Energy Efficiency: LED tape lighting is known for its low power consumption, making it an energy-efficient choice for linear lighting applications.
Why Customers Choose Tape Lighting
Customers are drawn to tape light for its versatility and ease of installation. Whether you’re illuminating a kitchen cabinet, adding accent lighting to a living room, or creating a modern look in a hallway, tape lighting adapts to almost any space. The price and product options vary, so you can find a solution that fits your budget and lighting needs.
For those interested in enhancing their kitchen cabinet or under-cabinet lighting, exploring under-cabinet LED ribbon lighting can provide more ideas and inspiration.
Understanding Technical Terms
- Density: Refers to the number of LEDs per inch or foot. High density tape delivers more light and smoother illumination.
- CRI: A higher Color Rendering Index means better color accuracy under the light.
- Lumens per Foot: Indicates the brightness output of the tape light.
- Power: Check the wattage and voltage requirements to ensure compatibility with your setup.
As you explore tape lighting, consider how it integrates with smart controls, installation tips, and creative applications, which will be covered in the following sections.
Choosing the right tape light for your needs
Key Factors When Selecting Tape Light
Choosing the right tape light for your smart lighting setup can make a big difference in both performance and satisfaction. With so many options available, it’s important to focus on a few essential features that impact the quality and usability of your lighting solution.
- LED Density: The number of light LEDs per meter or foot, often called high density or density tape, affects brightness and uniformity. High density tape lights provide a more continuous line of light, which is ideal for linear lighting in kitchens or under cabinets.
- Color Temperature: Tape lights come in a range of color temperatures, from warm white to daylight white. Tunable white options let you adjust the white light to match your mood or activity, offering flexibility for different spaces.
- CRI (Color Rendering Index): A higher CRI rating means colors appear more natural under the light. For kitchen cabinet or task lighting, look for a product with a CRI above 80 for better color accuracy.
- Power and Lumens: Consider the power consumption (watts per foot or meter) and the brightness (lumens per foot). For lighting kitchen spaces or accenting shelves, higher lumens provide more illumination, but also check your power supply compatibility.
- Size and Flexibility: Tape lighting comes in various widths and thicknesses. Measure your installation area to ensure the tape fits, especially for tight spaces like under-cabinet lighting or around corners.
- Product Rating and Durability: Check for ratings such as IP (Ingress Protection) if you need moisture resistance, especially in kitchens or bathrooms. A well-rated item will last longer and require less maintenance.
- Price and Availability: Compare price points and customer reviews for each product. In the United States, many reputable brands offer a range of tape lights to fit different budgets and needs.
Comparing Tape Light Types
| Type | Best For | Color Options | Density |
|---|---|---|---|
| Standard LED Tape | Accent lighting, shelves | Single white, tunable white | Medium |
| High Density Tape | Task lighting, kitchen cabinet | White, daylight white | High |
| Tunable White Tape | Living rooms, bedrooms | Tunable white | Medium/High |
| RGB/RGBW Strip Lights | Decorative, creative applications | Multicolor | Medium |
For those interested in exploring more colorful and creative lighting solutions, check out this guide on multicolor rope lights for inspiration.
Remember, the right tape light can elevate your lighting experience, whether you’re focusing on energy efficiency, smart controls, or creative applications. Take time to review product specifications and customer ratings before making your decision.
Installation tips for tape light
Preparing for a Smooth Installation
Before you start installing tape light, it’s important to check the product specifications. Look for details like LED density (measured in LEDs per meter or inch), lumens per foot, color temperature (such as warm white or daylight white), and CRI (Color Rendering Index). High density tape lights offer more even illumination, which is ideal for kitchen cabinet lighting or linear lighting in living spaces. Make sure the tape light matches your desired lighting effect, whether you want tunable white, static white, or color-changing options.
Step-by-Step Installation Guidance
- Measure your space: Accurately measure the area where you plan to install the tape lighting. This ensures you purchase the correct size and length of LED tape.
- Surface preparation: Clean the installation surface thoroughly. Dust and grease can affect the adhesive backing of the tape light, reducing its lifespan and performance.
- Cutting and connecting: Most LED tape lights can be cut at marked intervals (often every few inches). Use sharp scissors and follow the manufacturer’s guidelines to avoid damaging the product.
- Power supply: Choose a power supply that matches the wattage and voltage requirements of your tape light. Overloading can reduce the life of your LED lights.
- Mounting: Peel off the adhesive backing and press the tape light firmly onto the surface. For high density or heavier tape, consider additional mounting clips for extra support.
- Testing: Before finalizing the installation, test the lights to ensure all connections are secure and the lighting is even.
Common Installation Challenges
Customers often face issues with corners, uneven surfaces, or insufficient power. For tricky areas like under kitchen cabinets or around curves, look for flexible tape lighting products or use corner connectors. If you’re installing outdoors or in damp areas, consider outdoor-rated tape lights for added durability and safety.
Maximizing Performance and Longevity
- Choose tape lights with a high CRI for better color accuracy, especially in spaces where true color matters.
- Opt for tunable white or adjustable color temperature products to adapt your lighting to different moods or tasks.
- Check the product’s rating for indoor or outdoor use, and always follow the manufacturer’s instructions for installation and maintenance.
Proper installation not only enhances the look of your lighting kitchen or cabinet lighting but also ensures the longevity and efficiency of your LED tape. Taking the time to plan and execute each step will help you get the most out of your investment in smart lighting technology.
Integrating tape light with smart controls
Smart Controls: Making the Most of Your Tape Light
Integrating tape light with smart controls is a game changer for anyone looking to elevate their lighting experience. With the right setup, you can adjust brightness, color temperature, and even set schedules for your LED tape lights, all from your smartphone or voice assistant. This flexibility is especially valuable in areas like kitchen cabinet lighting, where you might want bright daylight white for cooking and a warm white for evening ambiance.
- Compatibility: Before purchasing, check if your tape lighting is compatible with popular smart home systems. Many high density LED tape products support platforms like Alexa, Google Home, or Apple HomeKit.
- Controllers and Hubs: Some tape lights come with built-in smart controllers, while others require a separate hub. Consider the price and features of each product, as well as customer reviews and rating, to find the best fit for your needs.
- Tunable White and Color Options: Tunable white tape lights let you shift from cool to warm white, adjusting the color temperature to match your mood or task. High CRI (Color Rendering Index) and high density LEDs ensure your lighting looks natural and vibrant.
- App Features: Look for apps that offer granular control over your lighting. Features like grouping, scenes, and automation can help you create the perfect lighting setup for your kitchen, under-cabinet, or linear lighting projects.
Key Considerations for Seamless Integration
When integrating LED tape lights with smart controls, pay attention to the power supply and connectivity. Ensure your power source matches the wattage and voltage requirements of your lighting tape. Also, check the size and density of your strip lights—high density tape offers more light LEDs per inch, resulting in smoother, more uniform illumination.
For larger installations, such as lighting kitchen spaces or long runs of cabinet lighting, consider the lumens per foot and the total length you need. Some products in the United States market offer modular extensions, making it easier to customize your setup.
- Installation: Refer to earlier sections for tips on mounting and connecting your tape light. Proper installation ensures reliable performance and longevity.
- Maintenance: Regularly check connections and clean the LED light surfaces to maintain high efficiency and brightness.
By combining the right product, smart controls, and thoughtful installation, you can create a dynamic and energy-efficient lighting environment tailored to your needs.

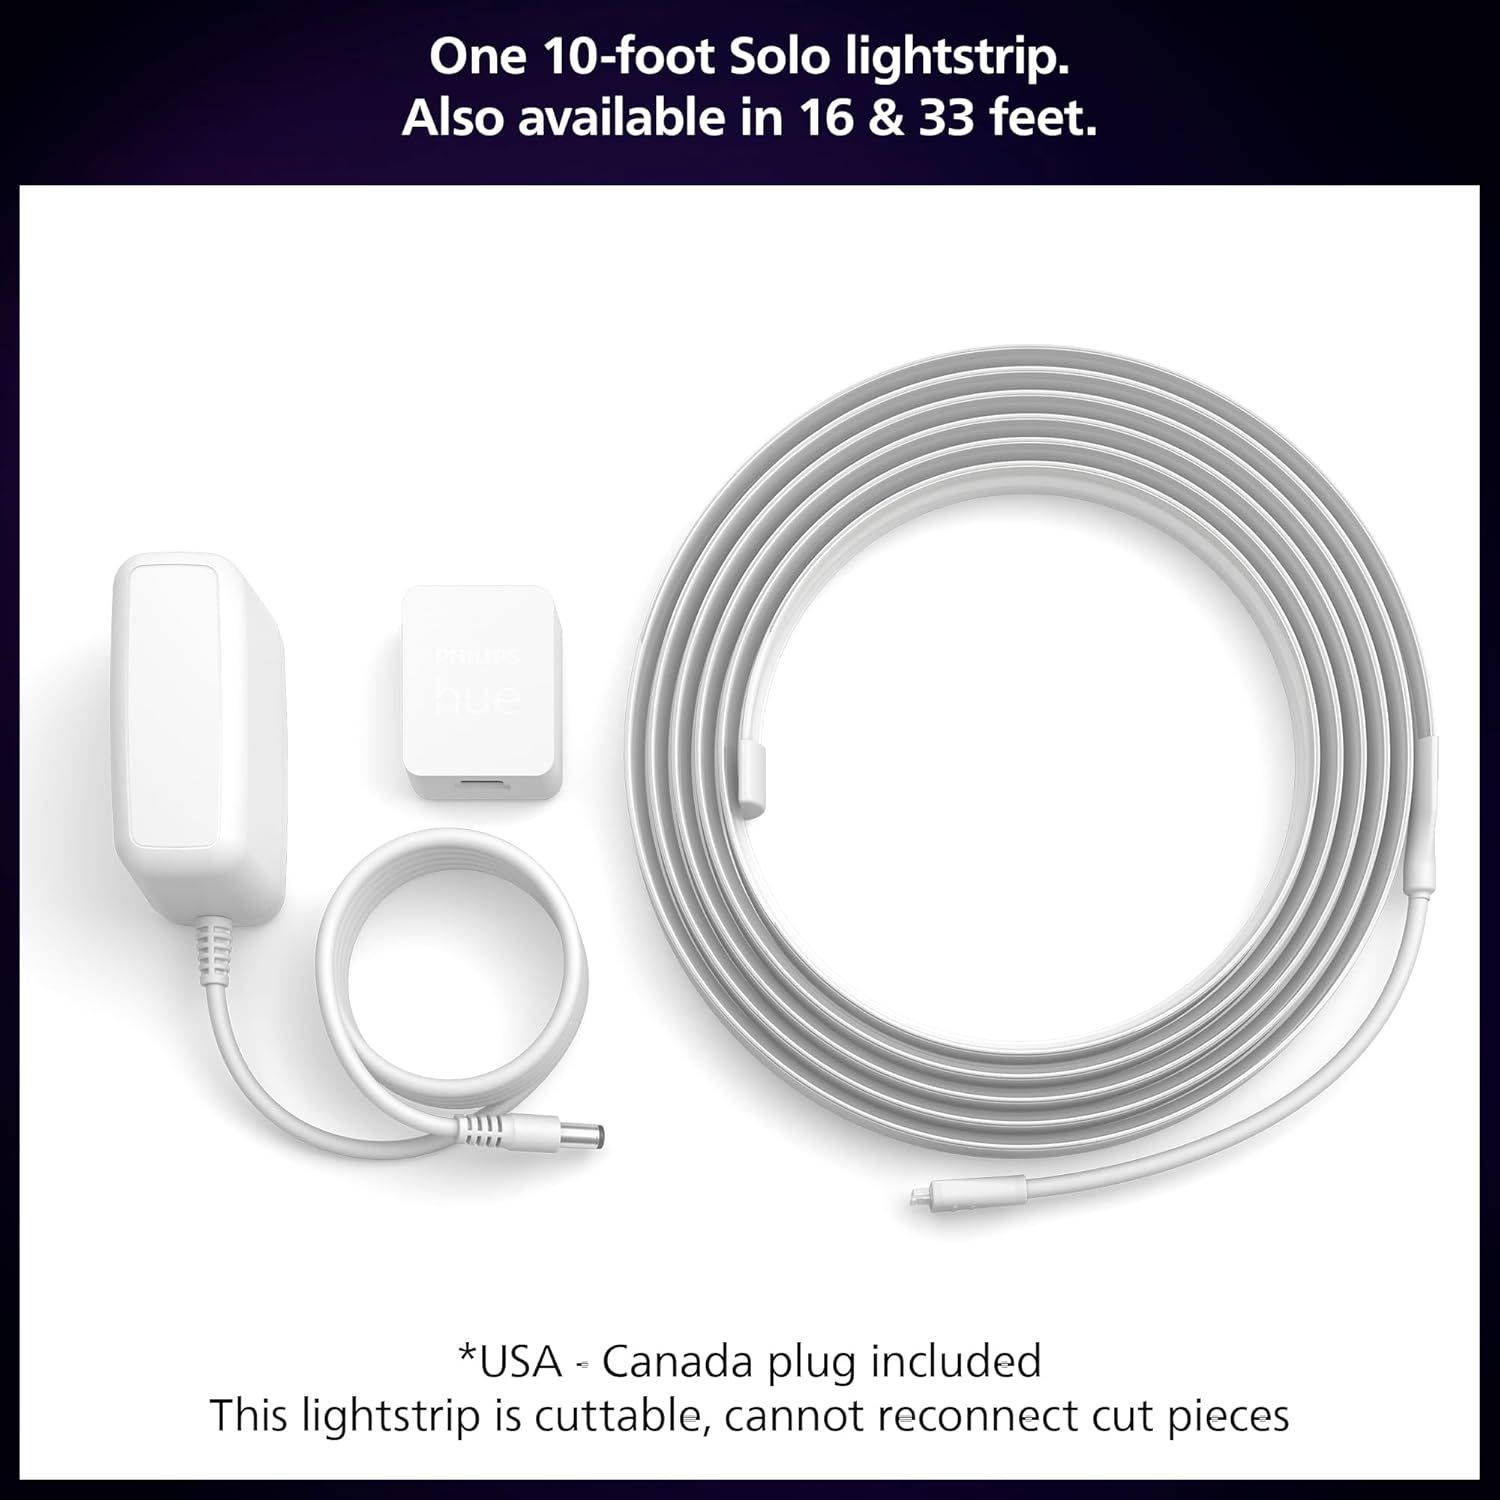
- + 10 ft length for flexible placement
- + RGBWW (full color plus warm-to-cool whites)
- + Works with Hue app for scenes and schedules
- + Voice control compatible with Alexa, Google Assistant, and Apple HomeKit
- + Easy setup single-pack base kit
Energy efficiency and maintenance
Balancing Energy Use and Light Output
One of the main advantages of using tape light in smart lighting is its energy efficiency. LED tape lighting consumes significantly less power compared to traditional lighting options, making it a popular choice for customers looking to reduce their electricity bills. The power usage of LED tape is often measured in watts per foot, and high density tape lights can deliver more lumens per foot, providing brighter light without a big increase in energy consumption. When choosing a product, check the lumens foot rating and compare it to your lighting needs—brighter isn’t always better if you want to save energy.
Understanding Color Temperature and CRI
Color temperature and CRI (Color Rendering Index) are important factors that impact both the quality of light and energy use. Tunable white and daylight white tape lights allow you to adjust the color temperature to suit different spaces, from warm white for cozy living areas to cooler white light for task lighting in the kitchen. High CRI LEDs ensure colors appear more natural, which is especially important for cabinet lighting or kitchen cabinet installations where accurate color is needed. While higher CRI and tunable options may have a slightly higher price, they often provide better lighting experiences and can be more energy efficient in the long run.
Maintaining Your Tape Lighting
Proper maintenance helps your tape lighting last longer and perform at its best. Dust and debris can reduce light output, so gently clean the surface of your LED tape and strip lights regularly. For areas like under-cabinet lighting or linear lighting in the kitchen, make sure the tape is securely attached and not exposed to moisture. If you notice any dimming or color changes, check the power supply and connections. Many products in the United States come with a rating for damp or dry locations—choose the right item for your space to avoid maintenance issues.
Comparing Product Features for Efficiency
| Feature | Impact on Efficiency | Customer Benefit |
|---|---|---|
| High Density LEDs | More light per inch, lower power per lumen | Brighter spaces with less energy |
| Tunable White | Adjusts color temperature, can optimize for time of day | Comfort and energy savings |
| Size and Length | Longer strips use more power | Customize to fit your needs, avoid waste |
| Power Supply | Efficient drivers reduce energy loss | Lower operating costs |
By considering these features and maintaining your tape lighting, you can enjoy efficient, high-quality lighting in any space, whether it’s for accent lighting, kitchen cabinets, or larger linear lighting projects.
Creative applications for tape light
Innovative Ways to Use Tape Light in Everyday Spaces
Smart tape lighting opens up a world of creative possibilities for both residential and commercial environments. Thanks to its flexible design, high density of LEDs, and tunable white options, tape light can be adapted to almost any lighting scenario. Here are some standout applications that showcase the versatility and impact of this product:
- Under Cabinet Lighting: Tape lighting is a top choice for kitchen cabinet illumination. It provides even, shadow-free white light, making food prep safer and enhancing the overall look of your kitchen. Customers often prefer high CRI and tunable white options to match different times of day or moods.
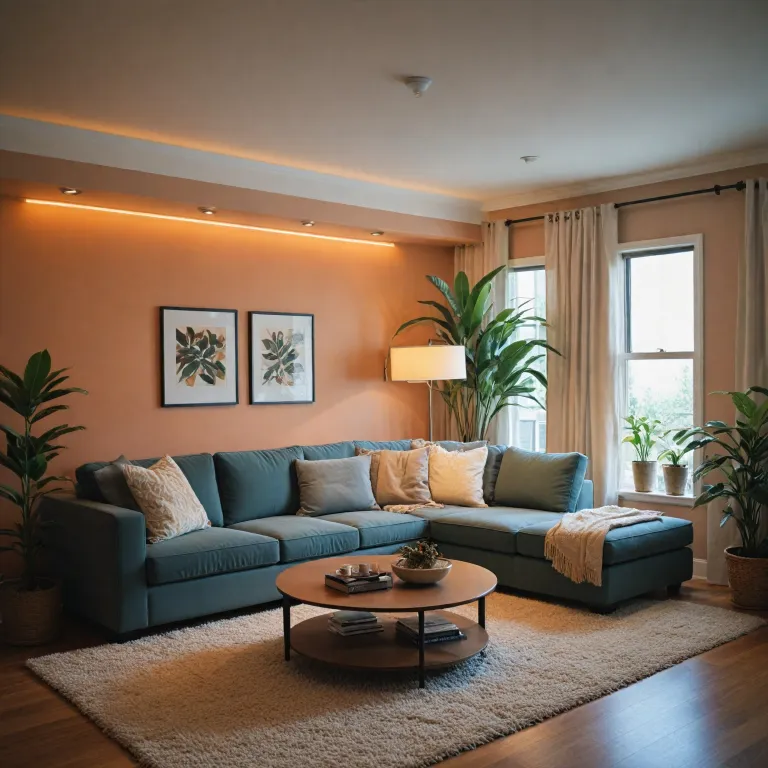
- Accent and Cove Lighting: Installing LED tape along coves or architectural features creates a soft, linear lighting effect. High density tape ensures a continuous line of light, eliminating visible dots and delivering a premium finish in living rooms, hallways, or commercial lobbies.
- Display and Shelf Lighting: Retailers and homeowners use tape lights to highlight products or collectibles. Adjustable color temperature and high lumens per foot help make items stand out, while the slim size of the tape fits discreetly on shelves.
- Stair and Pathway Illumination: Tape lighting can be installed along stair treads or pathways for both safety and style. Tunable white and daylight white options allow for customized ambiance, and high rating products ensure durability.
- Backlighting for TVs and Monitors: Adding LED tape behind screens reduces eye strain and creates a modern look. Customers appreciate the ability to adjust color and brightness to suit their viewing environment.
- Bathroom and Vanity Lighting: Tape lights with high CRI are ideal for mirrors and vanities, providing accurate color rendering for grooming tasks. Waterproof or high rating options are recommended for these damp environments.
Maximizing Flexibility with Tunable and High Density Tape
One of the biggest advantages of modern tape lighting is the availability of tunable white and high density options. Tunable white tape lets you shift from warm white to daylight white, adapting the lighting to your needs throughout the day. High density tape, with more LEDs per inch, delivers a smoother, brighter effect—perfect for applications where continuous, linear lighting is desired.
Considerations for Creative Projects
- Size and Power: Choose the right size and power output for your project. For longer runs or brighter effects, look for products with higher lumens per foot and suitable power ratings.
- Color Temperature: Select a color temperature that matches your space. Warm white is cozy for living areas, while daylight white is ideal for workspaces.
- Density: High density tape is best for visible installations, like under cabinets or along coves, where a seamless line of light is important.
- Product Rating: For areas exposed to moisture or dust, ensure the tape light has an appropriate rating for safety and longevity.
Whether you are updating your kitchen cabinet lighting, adding a modern touch to your living room, or looking for efficient linear lighting solutions, LED tape lights offer unmatched flexibility and performance. With a range of options in the United States market, customers can find the right product at the right price to suit any creative vision.