Understanding puck lights and their applications
What are puck lights and where are they used?
Puck lights are small, round light fixtures that resemble the shape of a hockey puck. These versatile lights are popular for accent lighting and task lighting, especially in kitchen cabinet lighting, under shelves, closets, and display cases. Their compact design makes them ideal for spaces where traditional light fixtures might not fit or look appealing.
Many homeowners in the United States choose puck lights for their kitchen cabinets, as they provide focused illumination for countertops and workspaces. Puck lighting can also be used to highlight artwork, brighten up dark corners, or add a modern touch to living spaces. Whether you want warm white or cool white light color, LED puck lights offer a range of color temperature options to suit different moods and needs.
Types of puck lights: plug-in, battery, and hardwired
Puck lights come in several types, each with its own installation and control methods:
- Plug-in puck lights: Easy to install, these lights simply plug into a wall outlet. They are convenient but may have visible cords.
- Battery-operated puck lights: These are wireless and portable, making them suitable for temporary setups or places without access to wiring. However, they require regular battery changes.
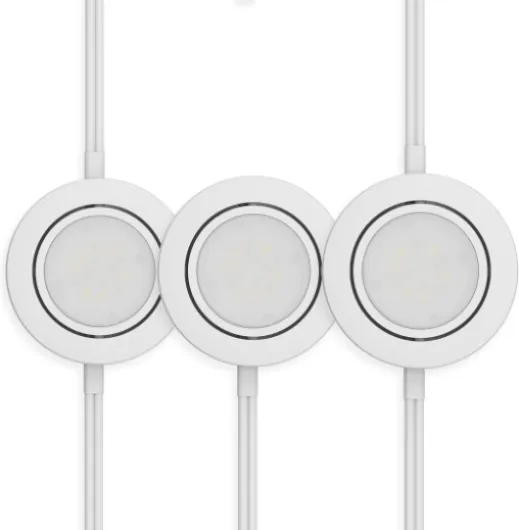
- Hardwired puck lights: These connect directly to your home’s electrical wiring, often through a junction box. Hardwired cabinet lighting offers a seamless look, reliable power, and is ideal for permanent installations.
Hardwired options are especially popular for kitchen cabinet and accent lighting, as they eliminate the need for visible plugs and wires. They can also be integrated with smart home systems for advanced control, such as dimming and scheduling.
Key features to consider
- LED technology: Most modern puck lights use LED light sources, which are energy-efficient and long-lasting.
- Dimmable options: Some puck lights are dimmable, allowing you to adjust brightness for different tasks or moods.
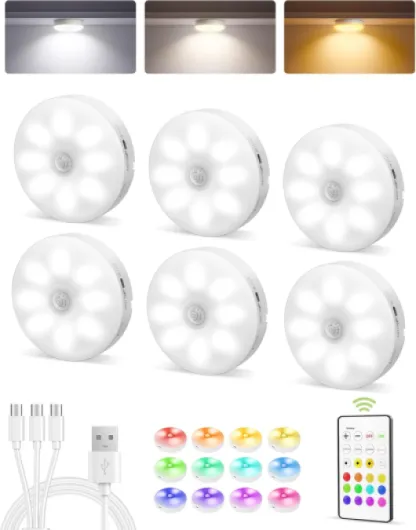
- Color temperature: Choose between warm white, cool white, or adjustable color temperature to match your space.
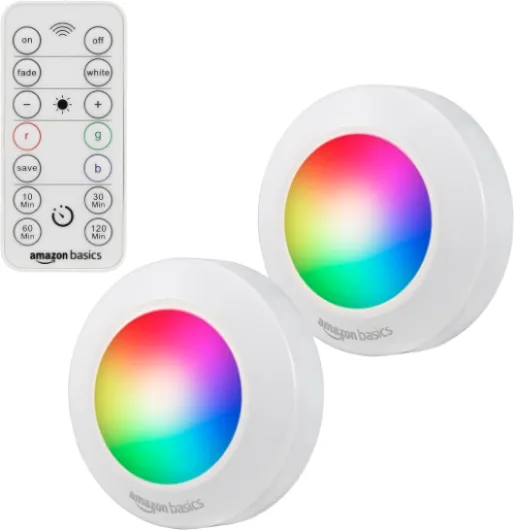
- Control methods: Depending on the product, you may control your lights via wall switches, remote controls, or smart home apps.
- Price and customer reviews: Product price and customer reviews can help you find the best value and performance for your needs.
For more insights on optimizing your lighting setup, including how to achieve the best lighting for high ceilings with smart lights, check out this guide to smart lighting for high ceilings.
Benefits of wiring puck lights directly to hard wire
Why Choose Direct Hardwiring for Puck Lights?
Directly wiring puck lights into your home’s electrical system offers several advantages over plug-in options, especially for kitchen cabinet lighting and accent lighting projects. Hardwired cabinet lighting creates a streamlined look, eliminating visible cords and plugs that can clutter your space. This approach is especially popular in the United States for modern kitchen cabinet and under-cabinet installations.- Seamless Integration: Hardwired puck lights blend into your kitchen or living area, providing a clean, professional appearance. This is ideal for both new builds and renovations where you want your lighting to look like a permanent fixture.
- Reliable Power Supply: With direct wiring, you avoid the limitations of plug-in power sources. This means your puck lighting is always ready, with no risk of accidentally unplugging a cord or overloading a wall outlet.
- Enhanced Control: Hardwired puck lights can be connected to wall switches, dimmers, or smart home systems, giving you more flexibility in how you control light color, brightness, and scheduling. Many LED puck lights are dimmable, allowing you to adjust the mood from cool white task lighting to warm white accent lighting.
- Customizable Placement: Without the need for nearby outlets, you can install puck lights exactly where you need them—inside cabinets, under shelves, or as accent lighting in display cases. This flexibility is a key reason why hardwired cabinet lighting is favored for custom kitchen projects.
- Long-Term Value: While the initial price of hardwired installation may be higher, the durability and professional finish often lead to better customer reviews and satisfaction. Hardwired LED light fixtures also tend to have a longer lifespan compared to plug-in alternatives.
Considerations for Direct Wiring
When planning to hardwire puck lights, it’s important to think about wiring access, junction box placement, and compatibility with your chosen light fixture. Some products are designed specifically for hardwired installations, while others may require adapters or additional wiring. Always check product specifications and customer reviews to ensure the puck light or box puck you select meets your needs for color temperature, dimmable features, and installation method. For those interested in how hardwired lighting can transform your smart home experience, you may find it helpful to read about how a globe flush mount light can transform your smart lighting experience. Direct wiring is a practical choice for anyone seeking a high-quality, integrated lighting solution for kitchen cabinets, accent lighting, or other spaces where both aesthetics and functionality matter.
- + Plug-in design for easy installation
- + Includes in-line dimmer for adjustable brightness
- + 3000K Warm White light color for cozy ambiance
- + Recessed or surface mount options for versatile installation
- + ETL Listed for safety assurance
Essential tools and materials for hard wiring puck lights
Gathering What You Need for Hardwired Puck Lighting
When planning to install puck lights directly to hard wiring, having the right tools and materials is essential for a safe and effective setup. This preparation step ensures your kitchen cabinet, accent lighting, or any other lighting project meets both performance and safety standards. Here’s what you’ll need:- Puck lights: Choose LED puck lights that are compatible with hardwired installation. Look for features like dimmable options, adjustable color temperature (cool white or warm white), and customer reviews that mention ease of installation and light color quality.
- Electrical wire: Use the appropriate gauge wire for your lighting load. Most LED puck lights require 18- or 20-gauge wire, but always check the product specifications.
- Wire connectors: These are essential for safely joining wires inside the junction box or wall box.
- Junction box: A box puck or standard junction box is required to house wire connections and comply with electrical codes in the United States.
- Wall switch or smart control module: For integrating your puck lighting with smart home systems, consider a compatible switch or smart controller for remote or app-based control.
- Mounting hardware: Most puck light kits include screws or adhesive pads. For hardwired cabinet lighting, screws are recommended for a secure fit.
- Drill and screwdriver: For mounting light fixtures and securing wiring.
- Wire stripper and cutter: To prepare the electrical wire for connections.
- Voltage tester: Always verify that power is off before starting any wiring work.
- Optional: If your product is not dimmable but you want adjustable brightness, look for a compatible dimmer switch or smart dimming module.
When selecting puck lights, compare price, color options, and whether the product is designed for plug-in or hardwired installation. Hardwired cabinet lights offer a cleaner look and more permanent solution compared to plug-in models. For more insights on how LED puck lights can enhance your smart lighting experience, check out this guide to LED puck lighting.
Remember, the right tools and materials not only make installation smoother but also ensure your lighting is safe, reliable, and ready for integration with your smart home system.
Step-by-step guide to hard wiring puck lights
Preparing for Installation
Before starting, make sure the power is turned off at the circuit breaker. Double-check with a voltage tester to ensure safety. Gather all the necessary tools and materials mentioned earlier, such as wire strippers, connectors, a screwdriver, and your chosen puck lights. Decide on the layout for your cabinet lighting or accent lighting, keeping in mind the placement for optimal light coverage and color temperature—whether you prefer cool white or warm white.Mounting the Puck Lights
Mark the spots where each puck light fixture will be installed under the kitchen cabinet or in your chosen location. Most puck lights come with mounting hardware. Secure the lights using screws or adhesive pads, depending on the product design. Ensure the lights are evenly spaced for consistent illumination and to avoid shadows on your countertop or display area.Wiring the Puck Lights
If your puck lights are designed for hardwired installation, locate the nearest junction box or wall box. Run the wiring from the box to each puck light location, following the manufacturer's instructions. Strip the wire ends and connect the black (hot), white (neutral), and green or bare (ground) wires from your home wiring to the corresponding wires on the puck lights. Use wire nuts or push-in connectors for secure connections. For dimmable LED puck lighting, make sure your dimmer switch is compatible with the product.Connecting to Power
Once all connections are made, carefully tuck the wires into the junction box or wall cavity. Attach the cover plate or box puck if required. Restore power at the circuit breaker and test each light. If your lights are plug-in models but you want a hardwired look, some products allow you to remove the plug and wire directly, but always follow the manufacturer's guidelines and local electrical codes.Testing and Adjusting
Turn on the lights and check for even illumination. Adjust the light color or color temperature if your puck lights offer this feature. Some LED light fixtures come with remote control or app-based control for added convenience. Review customer reviews for tips on achieving the best results with your specific product. If you notice any flickering or uneven brightness, double-check your wiring connections.- Always use UL-listed products for safety and reliability
- Label your circuit breaker for future reference
- Consider the price and features such as dimmable options or smart control compatibility
Properly hardwired cabinet lighting can transform your kitchen, accent lighting, or display areas, offering both style and function. For more details on integrating with smart home systems, refer to the next section of this guide.
Safety considerations and common mistakes to avoid
Electrical Safety First
When working with hardwired puck lights in your kitchen or cabinet lighting projects, safety should always come first. Before starting any wiring, turn off the power at the circuit breaker. Use a voltage tester to confirm the wires are not live. This helps prevent electrical shock and protects both the installer and the product.Common Wiring Errors to Watch Out For
Incorrect wiring can lead to issues like flickering lights, non-functioning fixtures, or even electrical hazards. Some frequent mistakes include:- Mixing up neutral and live wires, which can cause the puck light not to work or create a safety risk.
- Failing to secure connections with wire nuts or electrical tape, leading to loose wires inside the junction box.
- Overloading the circuit by connecting too many puck lights or other fixtures to one switch or wall box.
Choosing the Right Components
Always use components rated for your local voltage and current standards in the United States. Select LED puck lights and hardwired cabinet lighting products that are UL-listed or certified for safety. Double-check the compatibility of your dimmable puck lights with the chosen dimmer switch, especially if you want to control light color or color temperature (cool white or warm white).Proper Installation Practices
- Mount the puck light securely to avoid it falling or shifting inside the cabinet or under the kitchen cabinet.
- Keep wiring organized inside the junction box to prevent overheating or shorts.
- Do not run wires where they can be pinched by cabinet doors or drawers.
Testing and Final Checks
After wiring, restore power and test each light fixture. Confirm that all puck lights respond to your control system, whether it’s a wall switch, remote, or smart home hub. Check for consistent color temperature and brightness across all lights kitchen areas. Review customer reviews and product posts for additional tips on troubleshooting common issues with hardwired cabinet lighting.When to Call a Professional
If you are unsure about any step in the wiring process or if your local codes require it, consult a licensed electrician. This is especially important for complex installations involving multiple box puck lights, accent lighting, or integration with smart home systems. Proper installation ensures your lighting is safe, reliable, and enhances your kitchen or cabinet space.Integrating puck lights with smart home systems
Making Your Hardwired Puck Lights Smart
Once your puck lights are hardwired, the next step is integrating them into your smart home system. This allows you to control lighting, adjust color temperature, and set schedules for your kitchen cabinet or accent lighting, all from your phone or voice assistant. Here’s how you can bring smart control to your hardwired puck lighting setup:
- Choose Compatible Smart Switches or Dimmers: For hardwired cabinet lighting, replacing your standard wall switch with a smart switch or dimmer is often the simplest way to gain smart control. Make sure the product supports LED loads and is compatible with your puck light fixtures. Many smart switches are dimmable, letting you adjust the brightness of your kitchen lights or accent lighting to suit your mood.
- Consider Smart Plugs for Plug-In Puck Lights: If your puck lights are plugged into an outlet, a smart plug can provide on/off control. However, for fully hardwired installations, a smart switch or in-wall module is usually required.
- Smart Bulbs and Controllers: Some puck lights come with built-in smart features, such as adjustable color temperature (cool white to warm white) or app-based control. If your lights support this, follow the manufacturer’s instructions to connect them to your home Wi-Fi or hub.
- Integrate with Voice Assistants: Most smart switches and smart puck lights work with popular voice assistants. This lets you turn on your kitchen cabinet lights or adjust the color with simple voice commands.
- Automate with Routines and Schedules: Use your smart home app to set schedules for your puck lighting. For example, have your under-cabinet lights turn on automatically at sunset or when you enter the kitchen.
Key Points for Seamless Integration
- Check Compatibility: Not all smart switches or controllers work with every puck light product. Review customer reviews and product specifications before purchasing.
- Wiring Considerations: For hardwired installations, ensure your junction box and wiring can support the new smart device. If you’re unsure, consult a licensed electrician to avoid common mistakes.
- Network Requirements: Some smart lighting controls require a hub or specific Wi-Fi standards. Make sure your home network can support the devices you choose.
- Price and Features: Compare the price and features of different smart switches, dimmers, and puck lights. Look for options that offer the right balance of control, dimmable features, and color temperature adjustment for your kitchen or accent lighting needs.
By integrating your hardwired puck lights with smart home systems, you can enjoy flexible, energy-efficient lighting control throughout your kitchen, cabinets, or any accent lighting area. This approach not only enhances convenience but also adds value to your home lighting setup in the United States and beyond.

