Introduction to 3-Way Dimmer Switches
Exploring the Basics of a 3-Way Dimmer Switch
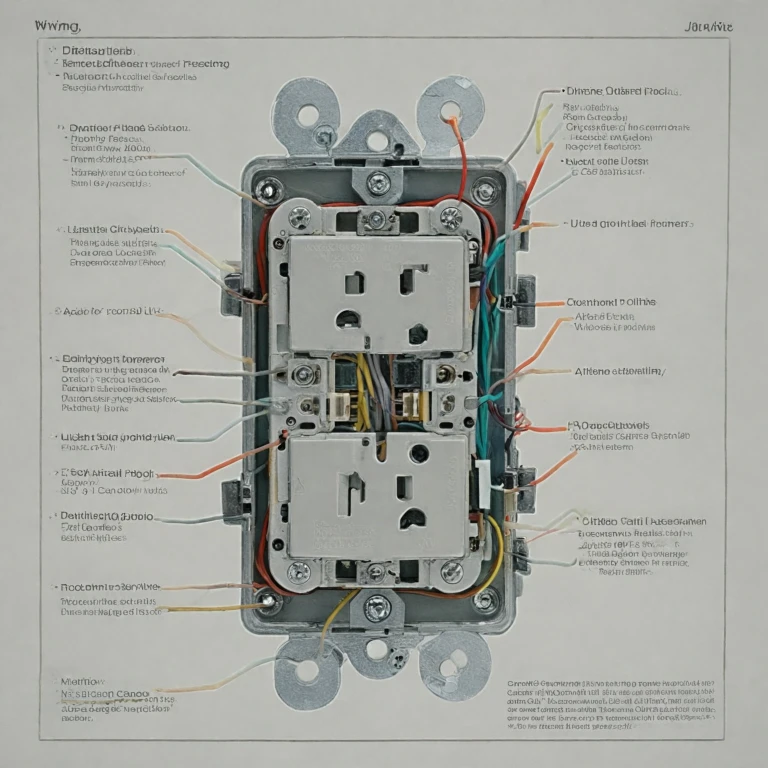
Understanding the wiring for a 3-way dimmer switch system can seem daunting, but it's an essential skill for those who wish to enhance their home's ambiance and energy efficiency. This type of switch allows you to control a light fixture from two different locations, making it a versatile option for large rooms or hallways. Before diving into the components and wiring schematic, let's familiarize ourselves with the basic elements involved. In essence, a 3-way dimmer switch acts as a bridge that manages the flow of electricity to a light fixture. It works in conjunction with two 3-way switches, enabling the lights to be turned on or dimmed from either point. If you're considering upgrading to a black dimmer switch for an elegant aesthetic, you'll find these options to be both stylish and functional (enhancing your home with a black dimmer switch). This kind of dimmer smoothly integrates into most electrical systems, including those that involve multiple wires like the hot, neutral, and traveler wires. The wiring of these switches utilizes different colored wires such as black, red, and white. Each has a specific function:- Black wire: This is typically the "hot" wire that carries the power from the supply source.
- White wire: Often referred to as the "neutral" wire, it completes the circuit and helps maintain a consistent flow of electricity.
- Red wire: Used as a traveler wire, facilitating the connection between switches.
Components of a 3-Way Dimmer Switch System
Key Parts of a 3-Way Dimmer Setup
In a 3-way dimmer switch configuration, understanding the various components is crucial for ensuring correct installation and functionality. Several wires and switch components come together to control the lighting in a room from multiple locations.
- Wiring and Switches: At the heart of a 3-way dimmer setup, there is a combination of switches and wires designed to facilitate variable control of light levels. A typical system includes the primary dimmer switch, a secondary switch, and connecting traveler wires that link the two switches.
- Color-Coded Wires: The white wire, often the neutral wire, plays a critical role, while the black and red wires serve as hot wires and travelers. These wires, along with the correct diagram, ensure proper current flow through the system.
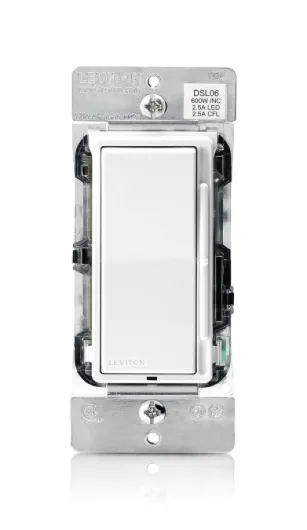
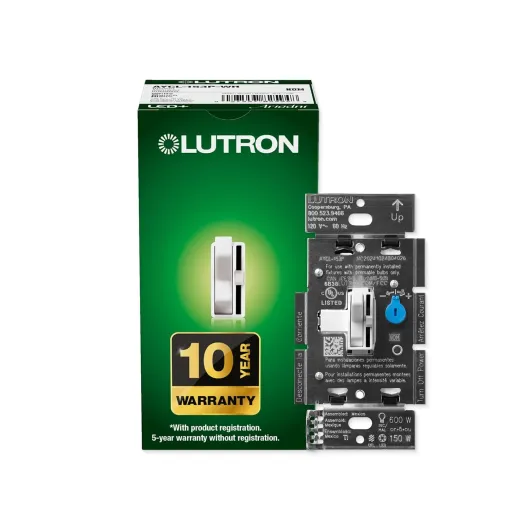
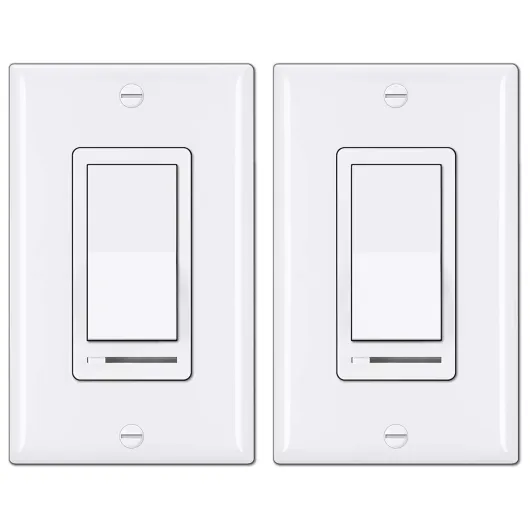
- Dimmer Switch Components: Components like Lutron dimmers can replace standard switches to allow for dimming functionality. Other necessary parts include proper wiring connectors to fix wires securely and electrical tape for added safety.
- Light Fixtures and Power Source: The light fixture is where the wiring completes its circuit, illuminating your space. This is connected through the fixture box and is powered by a source linked through the black hot wire.
Understanding the role each part plays can prevent potential errors and ensure your lighting system functions smoothly. It is always beneficial to consult a detailed guide on incorporating integrated lighting systems for enhanced functionality.
Step-by-Step Wiring Schematic Guide
Step-by-Step Guide to Wiring a 3-Way Dimmer Switch
Wiring a 3-way dimmer switch can seem daunting at first, but understanding the wiring schematic makes the task more approachable. Let’s break it down into manageable steps:
- Turn Off Power: Before starting, ensure power to the relevant circuits is turned off at the main breaker. Safety first to avoid any electrical hazards.
- Understand the Circuit: Typically, a 3-way dimmer switch setup includes two switches controlling a single light fixture. It involves several key wires: the hot (black), neutral (white), and traveler wires (often red).
- Locate Your Switches and Fixture Box: Identify the physical location of the switches and the light fixture. You’ll be working in these areas.
- Inspect the Existing Setup: Remove the existing switches and inspect the wiring inside. Note the colors and how the wires are connected. Documentation or a wiring diagram can be very helpful, especially if your setup is complex.
- Connecting the Dimmer: Begin by connecting the white neutral wire from the power source to the light fixture using a wire connector. Note: Lutron dimmers often come with detailed instructions that can be beneficial during installation.
- Wire the Switches: Connect the black wire (hot) from the power source to the black common terminal of the dimmer switch. Next, connect the red wire to one of the traveler terminals, often using the remaining black wire as a second traveler. Use electrical tape to secure the connections.
- Final Connections: Secure all connections within the fixture box, making sure no copper wire is exposed which could potentially cause short circuits.
- Test Your Setup: Once everything is wired correctly, switch the circuit back on at the breaker box and test your dimmer and switches to ensure everything is functioning properly.
This guide provides a solid foundation for wiring a 3-way dimmer switch. To further personalize and automate your home lighting system, enhancing your home with an adapter can be a step towards more smart home integration.
Common Challenges and Troubleshooting Tips
Addressing and Overcoming Typical Wiring Complications
When dealing with the intricacies of switch wiring, especially with 3-way dimmer switches, you might encounter several challenges. These issues can range from simple wiring color confusion to deeper electrical troubleshooting concerns.- Color Confusion with Wires: One of the most common dilemmas arises from the varying colors of wires. Typically, the black wire is hot, while the white neutral carries current back to the source. The red wire often serves as the traveler wire between switches. Properly identifying these wires ensures that the circuit functions correctly. Consult a wiring diagram specific to your switches or dimmer switch model to avoid any mistakes.
- Incorrect Connections: Ensuring that each wire connects to its rightful terminal is crucial. A mix-up could lead to poor performance or even potential safety hazards. The white wire usually goes to the fixture box, while the black and red wires interact with the switch and the circuit. Using electrical tape can help manage loose wires and secure connections.
- Dimmer Compatibility: Not all dimmer switches are compatible with every type of bulb, especially with LED variants. If you notice flickering or a delay in dimmer performance, check with the lighting fixture and ensure that it is suitable for your dimmer's wiring and specifications. Lutron switches, for instance, may require specific LED bulbs to function seamlessly.
- Inspecting the Fixture Box: Regular inspection and maintenance of the fixture box can help identify issues with the wires or the dimmer switch itself. A keen eye on the wiring diagram can aid in understanding any deviations in your current setup compared to the standard wiring schematic.
- Reddit Advice and Online Guides: For those who find pleasure in DIY projects, online resources, such as Reddit, can be invaluable. Other electrical enthusiasts often share their insights and solutions for peculiar wiring issues encountered with dimmer switches.
Integrating Smart Technology with 3-Way Dimmer Switches
Bridging Smart Technology and 3-Way Dimmer Switches
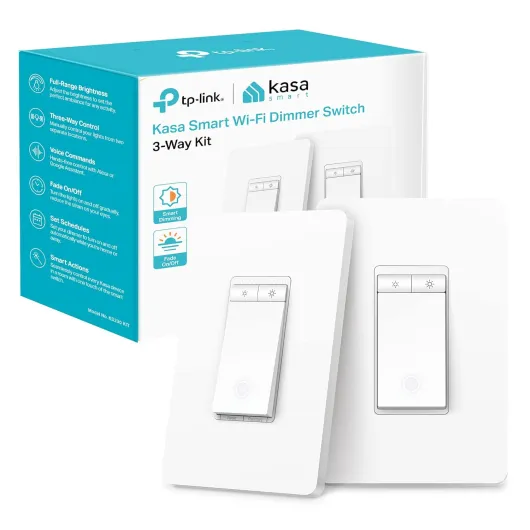
In today's connected homes, integrating smart technology with traditional 3-way dimmer switches transforms the way we manage lighting. This combination not only offers convenience but also enhances energy efficiency and personalization of your lighting schemes. One of the primary ways to merge smart tech with 3-way dimmer switches is through the use of smart dimmer switches, such as those offered by brands like Lutron. These devices connect to your existing wiring, allowing you to control your lights remotely via smartphone apps or voice-controlled smart home systems. When integrating smart technology, the process starts by identifying the wiring diagram for your current setup. Typically, this involves recognizing the white neutral wire, black hot wire, and red wire traveler connections in your switch wiring. Here's a concise process to get started:- Identify Wiring Components: Familiarize yourself with your dimmer switch system’s components such as the white wire, black wire, and wire traveler.
- Smart Dimmer Compatibility: Ensure your chosen smart dimmer switch is compatible with the existing light circuit. This usually means supporting both neutral and hot wire connections.
- Revised Wiring Schematic: Update your wiring schematic diagram to include the new smart switch component, ensuring the connections align with the smart switch's instructions. Note that some switches may necessitate grounding via a white neutral or require a specific wire arrangement.

