What Are Hardwired LED Strips?
Defining Hardwired LED Strips: A Modern Lighting Solution
Hardwired LED strips are a versatile and modern lighting solution perfect for enhancing various spaces. These strips consist of an array of light-emitting diodes (LEDs) mounted on a flexible tape, providing a continuous ribbon of vibrant illumination. Unlike plug-in alternatives, hardwired LED strips allow for direct connection to the electrical system of your home, eliminating the need for bulky plugs and freeing up outlets for other uses.
This type of LED lighting is commonly used for both functional and decorative purposes, with wide applications including under-cabinet lighting, accent lighting, and even task lighting. Hardwired options are favored for their neat installation, minimalistic appearance, and ability to deliver consistent power, ensuring longer lifespan and reliability.
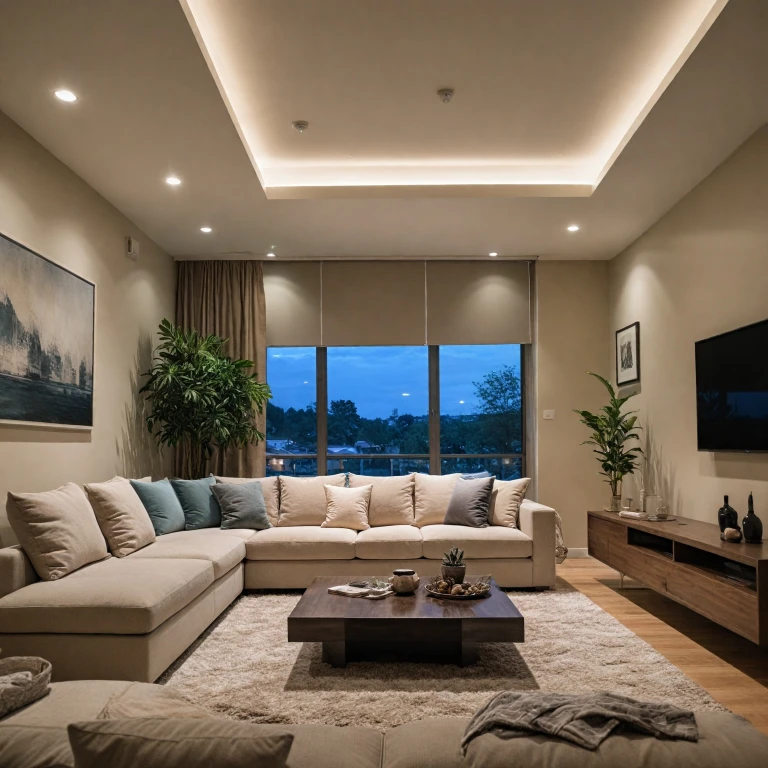
With numerous color options available, from warm white to a variety of vibrant hues, hardwired LED strips provide excellent flexibility in interior design. These strips are an ideal choice not only for kitchens and cabinetry setups but also for creating ambiance in living rooms, bedrooms, or even outdoor settings.
Keep in mind that hardwired LED strips come with different voltage requirements, which is crucial for determining a suitable power supply solution. This makes hardwired installations a step beyond simpler plug-in models, necessitating some familiarity with electrical wiring or professional installation for optimal results.
Advantages of Using Hardwired LED Strips
Exploring the Perks of Hardwired LED Lighting
- Consistent Power Supply: One of the primary advantages of hardwired LED strips is their stable power supply. Unlike plug-in options that may suffer from power fluctuations, hardwired systems offer a direct and reliable connection, ensuring your LED strips receive constant and adequate voltage.
- Customization Potential: Hardwired LED strips provide extensive customization options in terms of color and intensity. Whether you're looking for warm white lights for cabinet LED lighting or vibrant colors to set the mood, these strips have you covered. Customizing the lighting is easy with integrated controllers, making it possible to adjust the ambiance to suit any occasion.
- Enhanced Aesthetic Appeal: Sleek and flexible LED tapes seamlessly blend into any decor. Their slim design makes them nearly invisible when installed under kitchen cabinets or in tight spaces, allowing for a clean and modern look.
- Energy Efficiency: LEDs are known for their energy-efficient nature. Being hardwired means minimized power wastage, as there are no intermediary plugs or adapters that might consume additional electricity.
- Durability and Longevity: The hardwired setup often translates to fewer mechanical connections and, consequently, less wear and tear over time. This increases the lifespan of the strip lights and ensures consistent performance.
- Seamless Integration with Smart Systems: Once installed, hardwired LED strips can be easily linked with smart home systems to create dynamic lighting setups. There are many options to control the lighting through apps or voice commands, bringing convenience and flexibility to your fingertips.
For an in-depth guide on maximizing the functionality of your LED light strips and controllers, explore more features in our related post.
Installation Process for Hardwired LED Strips
Steps to Properly Install Your Hardwired LED Strips
Embarking on the installation of hardwired LED strips can transform your space, from kitchen to cabinet lighting, elevating ambience with various color options and lighting effects. Here’s a concise guide to help you execute the process with precision and ease.
1. Selecting the Ideal Location
Decide on the placement for your LED strips. Common applications include under cabinets, along counters, or under shelves in kitchens. Consider lighting needs and aesthetic goals, taking note of where the strip light will have the most impact.
2. Measuring and Preparing
Measure the surface where you plan to install the strip lights. Properly sizing your LED tape ensures an easy fit, which can be trimmed to the desired length, often following marked cut points on the tape. Clean the area to ensure the adhesive backing of the strip will attach securely.
3. Wiring and Power Considerations
Prepare for wiring by identifying the closest power source. The voltage of your LED power supply must be compatible with the LED light kit you are using. If uncertain about electrical work, consult with a professional to ensure safety and compliance with standards.
4. Mounting the Strips
Flexible LED strips often come with adhesive backing. Carefully peel off the adhesive cover and press the tape light firmly along the planned path. For extra security, additional mounts or brackets can be used, especially in complex installations or high-traffic areas.
5. Concluding Connectivity
Connect the LED strips to the power supply, ensuring all wires are securely fastened. Double-check connections before powering up. If integrating into a smart home system, follow specific instructions for compatibility and setup.
For more advanced setups that include outdoor lighting timers or additional features, consider reviewing specialized resources that delve deeper into the nuances of system integration and optimization.
Common Challenges and Solutions
Troubleshooting Common Issues with LED Strip Installations
Installing hardwired LED strips can be a rewarding project, but like any technical project, there are potential challenges. Being prepared for these will ensure that your LED lighting project runs smoothly.Wiring Difficulties
Improper wiring connections can result in your LED strips not lighting up or flickering. Ensure all wires are firmly connected and that polarity (positive and negative) is matched according to the LED strip's requirements. Consider using wire connectors to maintain secure and stable connections.Power Supply Concerns
Choosing the correct power supply voltage is critical. If your LED strips are not bright enough or are overheating, this could be due to an inappropriate power supply. Check the specifications of your LED lights and ensure the power source matches. For safer and more efficient operation, use a power supply specifically designed for LED lighting.Mounting and Adhesion Issues
LED strips often come with adhesive tape for easy installation, but surfaces such as wood or rough textures may not hold the tape well. To solve this, clean the surface before applying the tape, or use additional mounting clips for more secure attachment.Color Inconsistency
If you notice variations in color across your LED strip, this might be due to voltage drop. This can happen with longer strips. Opt for a high-quality LED strip with consistent chip spacing, or use a power injector to maintain color consistency throughout.Cabinet and Kitchen Light Integration
Integrating LED strips under cabinets or in kitchens can present design challenges. Ensure sufficient clearance and ventilation to prevent overheating. Selecting lights with adjustable color options can also help blend lighting seamlessly into your kitchen decor. Light strips can dramatically change the ambiance of a space, and addressing these common issues head-on can ensure longevity and performance of your hardwired LED strip installation.Integrating Hardwired LED Strips with Smart Home Systems
Integrating with Smart Home Ecosystems
Integrating hardwired LED strips with smart home systems can elevate your living space by offering greater control and flexibility. These synthetic enhancements pair well with your existing home automation setup, delivering a seamless lighting experience. To start the integration process:- Choose Compatible Devices: Many hardwired LED lights are compatible with popular smart home ecosystems like Amazon Alexa, Google Assistant, or Apple HomeKit. Ensure your chosen strip lights are supported by your preferred system.
- Opt for a Smart LED Controller: These controllers connect directly to your hardwired LED strips, allowing you to control them via smartphone apps or voice commands. Select a controller that supports your voltage and power supply requirements, while offering color and dimming options.
- Network Configuration: To get started, ensure your smart devices are connected to the same Wi-Fi network as your controller. This ensures your commands reach your LED setup without any interruptions.
- App Installation: Download and install the relevant app to manage your lighting settings. These apps let you set schedules, change colors, or adjust brightness levels effortlessly. Just be sure the app is compatible with your smartphone's operating system.
- Create Zones and Scenes: Within your app, arrange your kitchen, cabinet lighting, and other areas into designated zones. You can then customize each zone according to your preference, which provides a tailored experience and energy efficiency.
- Regular Updates: To keep up with advancements, regularly update both your smart devices and their corresponding apps. This ensures bug fixes and new features are always at your disposal.
Maintenance and Troubleshooting Tips
Ensuring Optimal Performance
Maintaining your hardwired LED strips is crucial to ensure they deliver optimal performance over time. Regularly check the condition of the power supply and connections; any loose wires or a faulty power source can affect the efficiency of your lighting setup. If you encounter flickering lights, it's often due to a disturbed connection or insufficient voltage. Ensure that your LED power supply is consistent and matches the specifications required by your light strips.
Troubleshooting Common Issues
Despite their apparent simplicity, hardwired LED strips may present certain challenges during use:
- Flickering or dimming lights: As mentioned, check your wire connections and ensure your power source delivers adequate voltage.
- Uneven lighting: Be sure to install the strips evenly; uneven placement can lead to varied light distribution. Adhesive tape can help maintain proper alignment.
- Heat management: While LED lights are generally cooler than other options, ensure they are not surrounded by flammable materials and have enough space to dissipate heat effectively.
Maximizing Lifespan
To extend the lifespan of your LED lighting, consider the environment in which they are installed. Excessive moisture or dust can reduce the life of the LED strips, so areas like the kitchen or cabinets may require additional maintenance. Choose suitable cabinet LED options that are designed to withstand such conditions, and always remember to switch the lights off when not in use to save energy and prolong the life of your light kit.
Regular Maintenance Practices
Routine cleaning can also enhance the longevity and efficiency of your lighting. Wipe down the LED strips with a soft, lint-free cloth to remove any dust accumulation. Avoid using harsh chemicals that might damage the protective layer on the LED strip light.
